You can import data into your workflow in Cflow via Excel Spreadsheet. Following are the scenarios where you will be in need of Excel Import.
- When you have historic data in an Excel Spreadsheet that you want to import into Cflow, you can use Excel Import.
- When you want to populate a Lookup/Master Table with data, you can use Excel Import.
Steps for setting up the Excel Import is given below:
- Select Admin -> Workflows.
- Click on a workflow. You can configure the Import/Export settings only at the initiator stage in a workflow.
- Select the initiator stage and click on the Import/Export icon.
List View of Workflow Stages:

Note: You can also customize the workflow stages view by clicking the Flowchart view button on the top right corner. This shows all the workflow stages in the form of flowchart. Click on the initiator/reviewer stage and all the relevant menu options are shown on the left side.
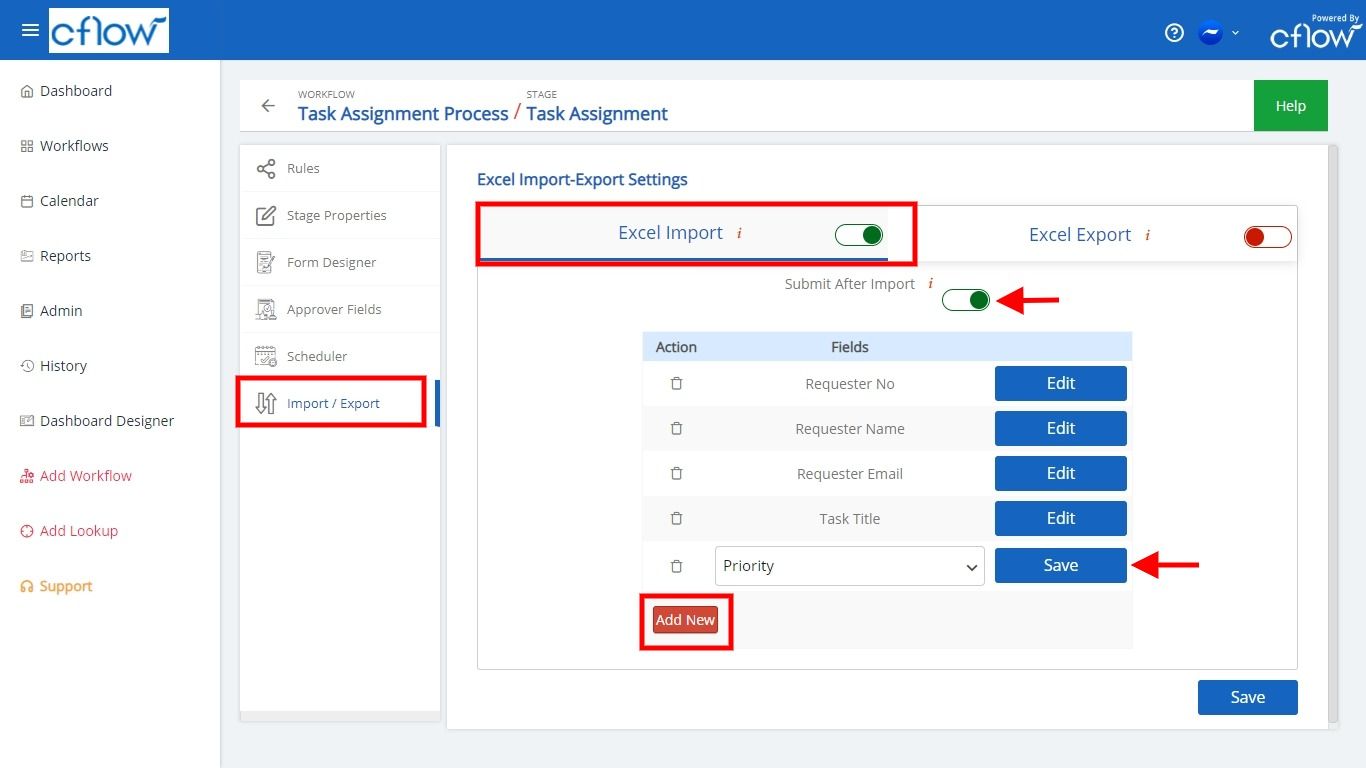
To import the field values from Excel, turn on the Excel Import toggle. Turning on the Excel Import toggle enables the import icon in the stage inbox. In the Excel Import, click on Add New and select the field from the dropdown. Click on save to add the field. Make sure that field names you have selected matches the order of columns in your Excel file. After adding the fields, click on the save icon at the bottom of the page. Turn on ‘Submit After Import’ to submit the request after the field values are imported in the form. This will process the rules and move the request to the next stage.
Click on the import icon ![]() in the stage inbox. Choose a file from your computer and click on Upload to import the field values from Excel to Cflow. The first row in the Excel file is considered as the header row and will be ignored.
in the stage inbox. Choose a file from your computer and click on Upload to import the field values from Excel to Cflow. The first row in the Excel file is considered as the header row and will be ignored.